Posted Friday, June 10, 2005
Hands On with the Epson Stylus Photo R2400
It's here! My Epson R2400 arrived from Adorama yesterday, and I've spent the last several hours setting it up, making test prints, fondling it, and doing all the usual things one does with a brand-new piece of expensive technology.
First impressions: This is one serious printer. The speed and quality of the mechanism are remarkable—this is no toy inkjet. (Of course, at $849US, it isn't priced as one.)
The print quality is also impressive, although I'm having a problem getting my printer's ink nozzles completely clean. As a result, I'm seeing just a slight bit of banding in some of my prints. And in the course of cleaning the ink nozzles again and again, I've wasted what feels like gallons of ink. I've made only three prints so far—two 8.5 by 11 and one 13 by 19—and some of my $13US apiece cartridges are almost half empty.
This girl likes to drink.
But let's begin at the beginning—with the obligatory unpack and setup photo shoot.
What's in the Box
The R2400 includes very good documentation, a CD-ROM containing Windows and Mac drivers and other goodies, a set of nine ink cartridges, various paper-handling trays, and a FireWire cable. (You can also connect the printer via USB.)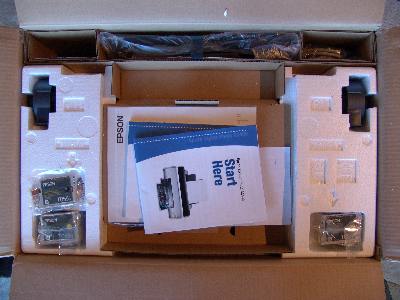
After removing the printer from the box, you remove a dozen or so pieces of tape and plastic that hold the printer's doors in place during shipping and protect them from scratches. Then you're ready to stock up the bar by inserting eight ink cartridges in their respective slots in the ink well at the right side of the printer. (The ninth cartridge is an alternate black that you must swap out by hand when printing on matte-finish paper.)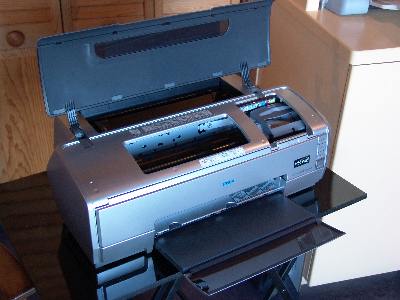
Epson's documentation instructs you to turn the printer on before loading ink. Each cartridge slot has a small indicator light above it. When the light's on, that cartridge is empty. On my printer, one of the lights—the one for the magenta cartridge—was not lit, even though the printer is brand new. I'm hoping this doesn't indicate a problem. The last thing I want to test is Epson's warranty support, especially for a box that weighs 37 pounds.
Ink Up
Loading up the ink is easy. Before unwrapping the cartridges, shake them a few times, then insert each one in its respective slot. Each cartridge is shaped slightly differently, so you can't insert it in the wrong slot.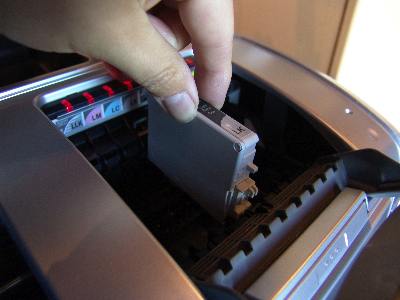
Once you've inserted all eight cartridges, you close the cartridge door and push a button on the front of the printer. The printer then chugs away for about two minutes as it charges its ink lines.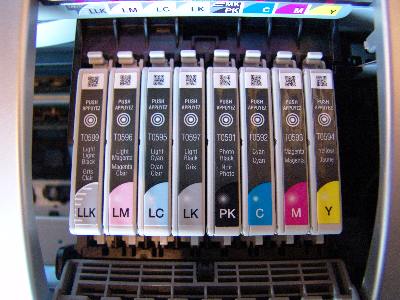
Install Drivers and Go
Next, I connected the printer's FireWire cable to a FireWire hub and installed the drivers. The R2400 installation CD also includes additional color profiles that I'll be experimenting with later.
Installation went without a hitch. Mac OS X's Printer Setup utility saw the printer immediately, and everything just worked. (I've connected the printer to my main production G5 box, which is running Mac OS X 10.3.9. I still haven't upgraded to Tiger on this machine, though I am running it on my PowerBook and my testbed and film-scanning machine, an older dual-processor G4. Epson's system requirements don't mention Tiger, and I'll be interested to see if there are any compatibility issues. I decided I'd get to know the printer before taking it out for a Tiger joyride. That's just the kind of guy I am.)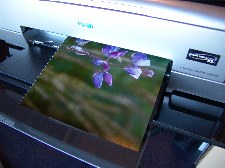 My first test was a letter-sized print printed directly from iPhoto. The Epson driver provides numerous paper-size and paper-handling options, and I decided to start out with a borderless print. The two letter-sized borderless prints I've made have a tiny—less than one-sixteenth of an inch wide—white strip on one side. This may be operator error, though. The one 13 by 19 print borderless print I've made is indeed borderless, and is gorgeous. Really gorgeous.
Better in Black and White
The three prints I've made this morning have been on Epson Premium Luster Photo Paper. For one of the prints, I tried the R2400's advanced black-and-white mode. In this mode, Epson's driver does an on-the-fly conversion of a color image, and several dialog box options allow you to tweak the contrast and tonality settings of the resulting print (learn more here).
The results are amazing. My first test print was easily the best black-and-white print I've ever seen come out of an inkjet printer. The blacks are truly black, with no slight tint. It looks like it came out of a photographic darkroom.
Darkroom Equipment for Sale
My impressions after four hours? Wow. Anyone want to buy a Beseler 23C enlarger?
I'm still a little concerned about my inability to get the ink nozzles completely clean. The Epson printer utility prints a test pattern, and if you see any gaps in the pattern, you're supposed to run the ink-sapping cleaning routine. I've done that about six times, and while the pattern has cleaned up dramatically, there are still a few gaps here and there. And I'm suspecting that's why some of my prints have very faint bands. (And I mean faint: they're almost invisible at arm's length.)
Of course I'll be posting regular updates as I get to know this lovely machine. But now, if you'll excuse me, I'm off to order some more ink cartridges.
Speaking of ordering. Have you ordered your copy of the world's best-selling iLife book? Amazon is selling The Macintosh iLife '05 for $23.09. That quite a deal for 345 full-color pages and a two-hour, 43-minute instructional DVD. Read the reviews on Amazon's site, then order your copy—so I can afford to feed this new printer of mine.